
1. Introduction to PKNIC and .pk Domain Registration
PKNIC is the official registry for .pk domains, managing domain registrations for various extensions, including:
✅ .com.pk (For commercial entities)
✅ .net.pk (For network-related businesses)
✅ .org.pk (For non-profit organizations)
✅ .edu.pk (For educational institutions)
Registering a .pk domain involves selecting an available domain, generating an invoice, and completing the payment.PKNIC manages .pk domain registrations, including .com.pk, .net.pk, and .org.pk, providing domain services for businesses, organizations, and individuals.

2. Requirements for Registering a .pk Domain
Before registering a .pk domain, ensure you have:
✔️ A valid PKNIC account (Sign up at PKNIC.net.pk)
✔️ Sufficient Prepaid Cards or Credit Balance
✔️ Accurate Registrant Information (Company name, address, email)
Educational and governmental domains require additional documentation.
To register a .pk domain, you need:
✔️ A PKNIC Account – Sign up at PKNIC.net.pk.
✔️ Sufficient Balance – Use PKNIC prepaid cards or other payment methods.
✔️ Registrant Details – Provide accurate name, email, phone number, and address.
✔️ Domain Availability – Ensure your desired domain name is not already registered.
✔️ Special Documentation – .edu.pk and .gov.pk domains require verification documents.
Meeting these requirements ensures a smooth .pk domain registration process.

3. How to Register a .pk Domain in the PKNIC Panel
Step 1: Log in to the PKNIC Panel
- Visit PKNIC.net.pk.
- Click "Login" and enter your credentials.
Step 2: Check Domain Availability
- In the Domain Registration section, enter your desired domain name.
- Click Check Availability.
- If available, proceed with registration.
Step 3: Fill in Registrant Details
Enter the domain owner’s details, including:
✅ Name & Organization
✅ Email Address
✅ Contact Number
✅ Address
❗ Note: Ensure the information is accurate to avoid verification issues.
Step 4: Choose the Registration Period
PKNIC allows 2 to 10-year domain registrations. Select the desired duration.
Step 5: Submit the Registration Request
Click Submit to generate an invoice for payment.
4. How to Create an Invoice Manually in PKNIC
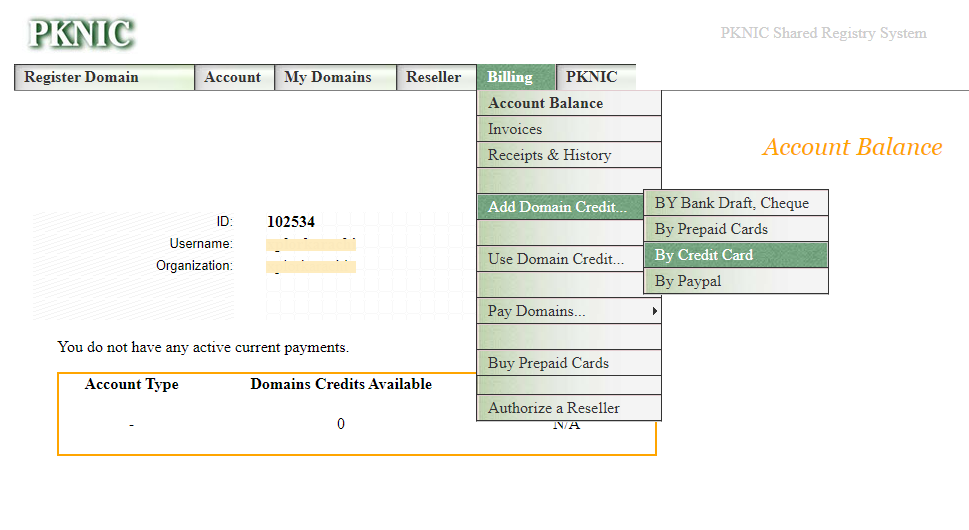
Step 1: Navigate to the Billing Section
- Log in to your PKNIC account.
- Click on Billing & Invoices in the dashboard.
Step 2: Select Domain for Manual Invoice Generation
- Choose the domain name for which you want to generate an invoice.
- Click Generate Invoice Manually.
Step 3: Choose Payment Method
PKNIC offers multiple payment methods, including:
✅ PKNIC Prepaid Cards
✅ Bank Transfer
✅ Credit/Debit Card
Step 4: Confirm and Download Invoice
- Review the billing details.
- Click Confirm to generate the invoice.
- Download the invoice in PDF format for reference.
Step 5: Make the Payment
- If using a PKNIC Prepaid Card, enter the card PIN under the "Prepaid Cards" section and click Apply.
- If paying via Bank Transfer, follow the provided bank details and submit a payment receipt to PKNIC support.

5. Common Issues and Troubleshooting
❌ Domain Not Available
✔️ Try modifying the domain name or check for alternative extensions.
❌ Invalid PKNIC Card
✔️ Ensure the card PIN is correct and has sufficient balance.
❌ Invoice Not Generated
✔️ Refresh the Billing section or contact PKNIC support for assistance.
❌ Payment Not Reflected
✔️ Bank transfers may take 24–48 hours. Ensure you upload the payment receipt for verification.


You must be logged in to post a comment.