
1. Introduction to Package Upgrades and Downgrades
Web hosting plans are designed to accommodate various customer needs, from basic websites to resource-intensive applications. As business requirements evolve, users may need to upgrade to a higher-tier plan for additional resources or downgrade to a smaller plan to reduce costs.
The Client area provides a streamlined interface where users can manage their hosting plans, including upgrading or downgrading their packages. This guide walks through the process to ensure a smooth transition without service interruptions.
![The only guide you’ll ever need to implement upgrade & downgrade flows [Part 2]](https://cdn.prod.website-files.com/61f2a5e1749ea1b6f2b98393/63ece090939fb3874307af10_Upgrades%20downgrades%20part%202.png)
2. Benefits of Adjusting Hosting Packages
Changing a hosting package offers several advantages:
- Scalability: Businesses can scale up as traffic increases or scale down during low-demand periods.
- Cost Efficiency: Users pay only for the resources they need, reducing unnecessary expenses.
- Seamless Resource Allocation: Upgrading provides instant access to additional bandwidth, storage, or processing power.
- No Data Loss: The process does not affect website data, ensuring a smooth transition.
By leveraging the package modification feature, customers can optimize performance while maintaining cost-effectiveness.

3. Prerequisites for Changing a Customer Package
Before upgrading or downgrading a package, ensure the following conditions are met:
- Account Credentials: You must have valid login details for the Client area.
- Billing Status: Ensure there are no pending invoices that could delay changes.
- Compatibility Check: Review the differences between packages to confirm compatibility with current website requirements.
- Backup Recommendation: While the process is generally seamless, creating a backup is advisable in case of unexpected issues.

4. Step-by-Step Guide to Upgrading/Downgrading in Client area
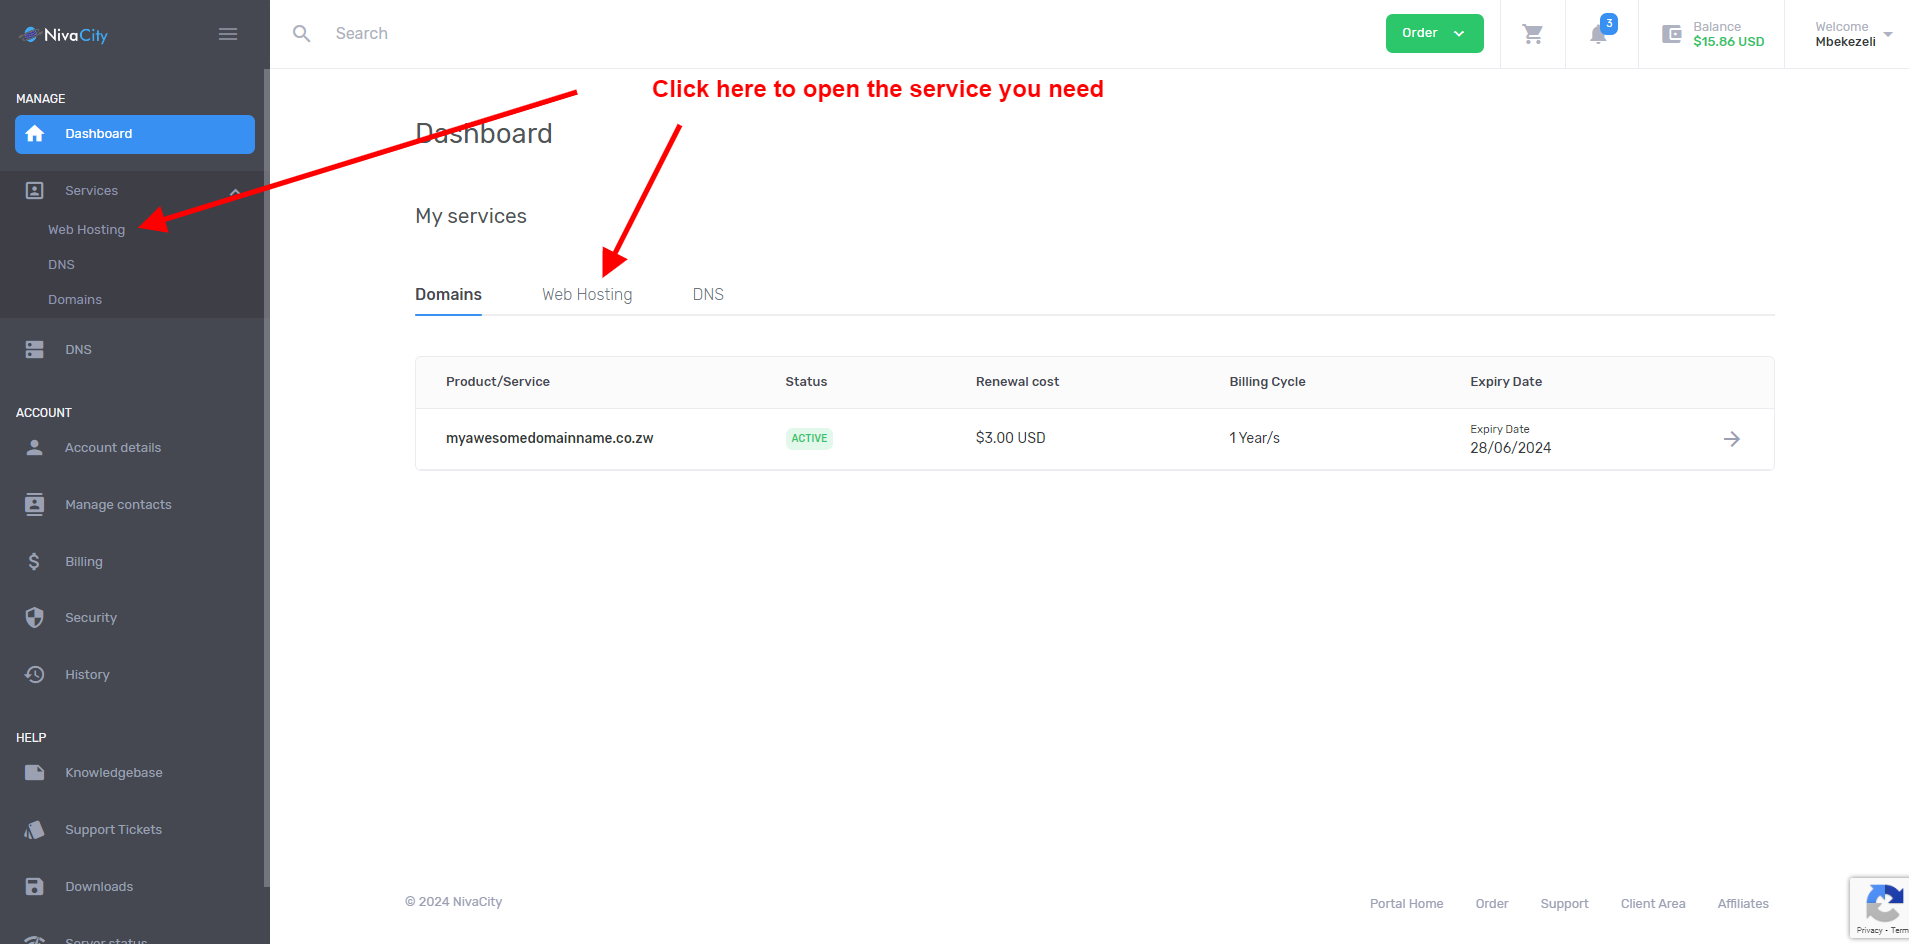
Step 1: Log in to Client area
- Navigate to your hosting provider’s Client area portal.
- Enter your username and password, then click Login.
Step 2: Locate Your Active Service
- In the dashboard, find the "My Services" section.
- Select the hosting package you want to modify.
Step 3: Choose Upgrade/Downgrade Option
- Click on the "Upgrade/Downgrade" button within the service details page.
- Review the available packages and select the one that meets your requirements.
Step 4: Confirm Payment (If Applicable)
- If the new package requires additional payment, proceed to the billing section.
- Complete the payment using the available methods.
Step 5: Wait for Processing
- The system will automatically adjust your resources.
- Once completed, you will receive a confirmation email.
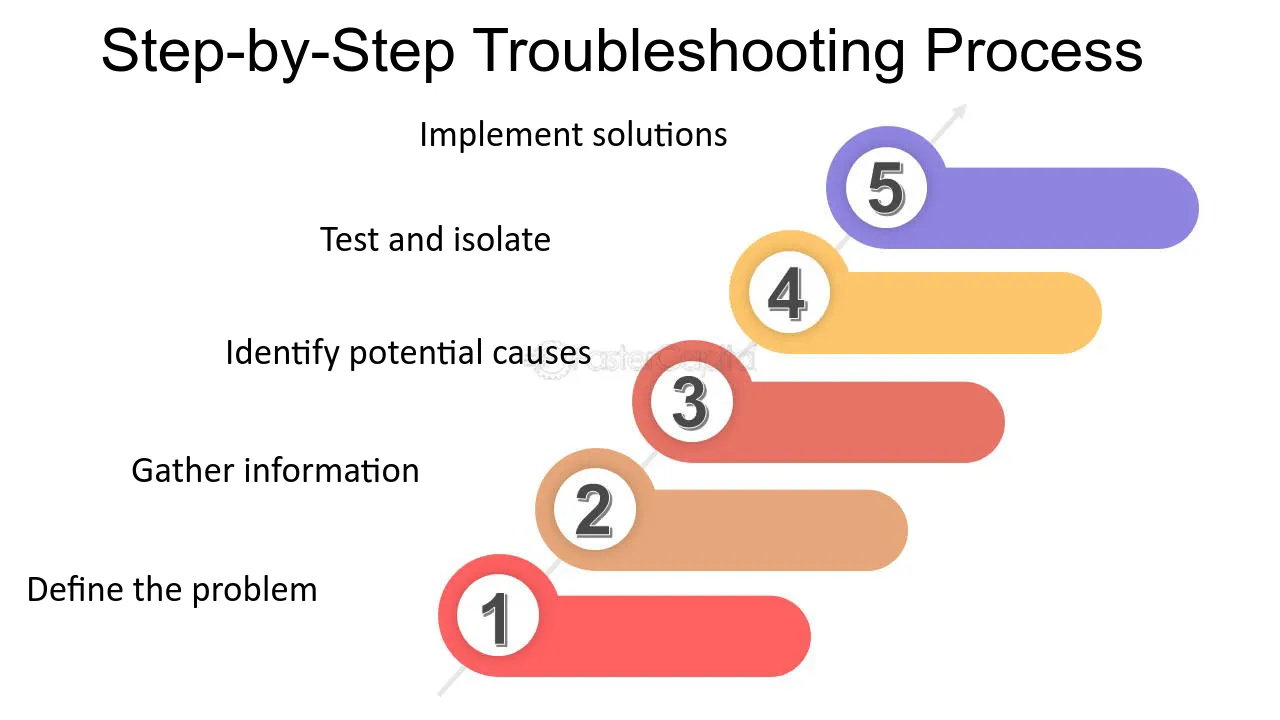
5. Common Issues and Troubleshooting
If you experience issues during the upgrade/downgrade process, consider the following solutions:
- Pending Invoice Blocking Changes: Check your billing section and ensure all payments are cleared.
- Package Not Available: Some hosting providers restrict certain upgrades. Contact support if your desired package is not listed.
- Website Downtime After Upgrade: Restart your hosting service or contact support if the site does not load properly.
- Insufficient Disk Space for Downgrade: Ensure your current storage usage fits within the limits of the lower-tier package.
By addressing these common problems, users can ensure a seamless experience when modifying their hosting plans.
If you encounter issues during an upgrade or downgrade, check for pending invoices, ensure sufficient disk space, and restart services if downtime occurs. If a package is unavailable or changes aren’t applied, contact support for assistance. Backup data before making modifications to prevent potential issues.

You must be logged in to post a comment.