
Table of Contents
- Introduction to WordPress Installation via cPanel
- Step 1: Log in to cPanel
- Step 2: Search for Softaculous App Installer
- Step 3: Remove Any Existing WordPress Installation
- Step 4: Generate a Secure Password
- Step 5: Install WordPress
- Step 6: Access Your WordPress Dashboard
- Conclusion
Introduction to WordPress Installation via cPanel
WordPress is the most widely used content management system (CMS), powering millions of websites worldwide. It offers a user-friendly interface, extensive customization options, and powerful features for beginners and advanced users alike. One of the easiest ways to install WordPress is via cPanel’s Softaculous App Installer. Softaculous simplifies the installation process, allowing you to set up WordPress in just a few clicks without requiring technical expertise.
In this guide, we’ll walk you through the complete process of installing WordPress using cPanel’s Softaculous. Whether you’re a website owner, blogger, or business professional, this step-by-step tutorial will help you quickly deploy WordPress on your hosting server.
Step 1: Log in to cPanel
To begin, access your cPanel account by following these steps:
- Open your web browser and go to your cPanel login page. The URL is typically
yourdomain.com/cpanelor provided by your hosting provider. - Enter your username and password provided by your hosting company.
- Click the Log in button to access the cPanel dashboard.
Once you’ve logged in, you’ll be able to access various tools and settings to manage your hosting environment.
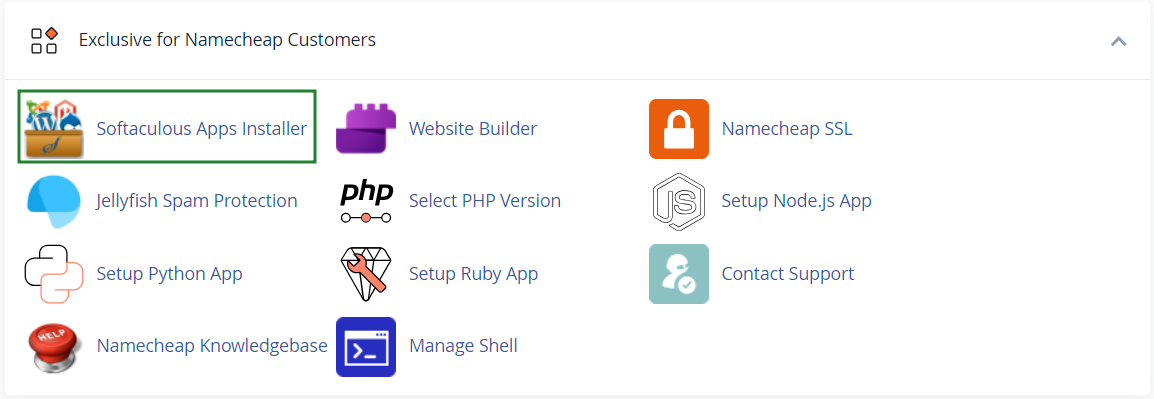
Step 2: Search for Softaculous App Installer
Softaculous is an automated application installer that simplifies the process of setting up WordPress. Here’s how to find it:
- In the cPanel dashboard, locate the Softaculous Apps Installer under the "Software" section.
- Click on the Softaculous icon to open the application.
- In the Softaculous interface, search for WordPress using the search bar.
- Click on WordPress to proceed with the installation.
Softaculous provides an easy-to-navigate interface where you can manage applications, install scripts, and handle software updates.
Step 3: Remove Any Existing WordPress Installation
If you have a previous WordPress installation, it’s recommended to remove it before proceeding with a fresh installation. Follow these steps:
- In the Softaculous dashboard, find the list of installed applications.
- Locate your existing WordPress installation and click Remove.
- Ensure that any WordPress files in the In Directory field are deleted.
- Follow the prompts to confirm the removal process.
Removing old WordPress installations prevents conflicts and ensures a clean installation without residual files from previous versions.
Step 4: Generate a Secure Password
Security is crucial when setting up a WordPress website. To protect your site from potential threats, create a strong and unique password for the admin account.
- When prompted during installation, enter a secure password for the WordPress admin account.
- Use a combination of uppercase letters, lowercase letters, numbers, and special characters to enhance security.
- Save the password in a safe location, such as a password manager, for future reference.
A strong password prevents unauthorized access and ensures your website remains protected against potential cyberattacks.
Step 5: Install WordPress
Now that you have removed any previous installations and generated secure credentials, you can proceed with the WordPress installation.
- In Softaculous, click on Install WordPress.
- Choose the domain where you want to install WordPress (e.g.,
yourdomain.com). - Configure the site settings, including:
- Site Name: Your website’s title.
- Admin Username: The login username for WordPress.
- Admin Password: The secure password you generated earlier.
- Select the installation directory (leave it blank if you want to install WordPress on the root domain).
- Click Install and wait for the process to complete.
Softaculous will handle the setup, database configuration, and file installation automatically. Once completed, you will receive a success message.
Step 6: Access Your WordPress Dashboard
After the installation is complete, you can log in to your WordPress admin dashboard and start customizing your website.
- You will receive a confirmation message with your WordPress login URL (e.g.,
yourdomain.com/wp-admin). - Open the URL in your web browser.
- Enter the admin username and password you set during installation.
- Click Log in to access the WordPress dashboard.
From the dashboard, you can install themes, customize your website, create pages, and publish content.
Conclusion
Installing WordPress using cPanel’s Softaculous App Installer is a simple and effective method for setting up a new website. By following these step-by-step instructions, you can quickly deploy WordPress, ensuring a smooth and hassle-free experience. Whether you’re building a blog, business website, or eCommerce store, WordPress provides the flexibility and scalability needed for success.
Take the next step by exploring WordPress themes, plugins, and customization options to enhance your website’s functionality and design. Happy blogging!

You must be logged in to post a comment.